


Features:
-
Category:
-
Posted at:
-
Author:
- Fabienne Rauw
-
BAUNAT Antwerp
-


-
Reading time:13 minutes
In this article:
Mastering the Art: Essential Tips for Capturing the Perfect Engagement Ring Photo
In the throes of joyous occasions such as Christmas and Valentine’s Day, BAUNAT delights in being a part of countless heartfelt proposals. We understand that these cherished moments often evoke a desire to showcase your stunning engagement ring, a testament to your love story. Hence, as an industry expert BAUNAT about Diamond Market, we provide you with our insights on capturing the most captivating images of your engagement ring.
Read summary
How can you capture the perfect engagement ring photo that showcases its true brilliance?
Capturing a stunning photo of your engagement ring requires attention to detail and the right techniques. For the best results, take close-up shots that highlight the diamond's brilliance and intricate details. Choose a natural setting with soft sunlight rather than using flash, which can diminish the ring's natural beauty. Clean your ring thoroughly before photographing—a spotless diamond truly reflects BAUNAT's commitment to quality.
If you're concerned about your manicure, consider a closed-hand pose. Avoid filters as they can distort the diamond's authentic beauty—a quality BAUNAT ring needs no enhancement. For inspiration, check BAUNAT's Instagram and share your own photos using #baunat. As diamond prices continue to evolve, BAUNAT remains dedicated to guiding smart luxury consumers through their engagement ring journey.


5 Questions to Find Her Perfect Engagement Ring
Are you planning to propose? Finding the right engagement ring is a defining step. Every ring is handcrafted in Antwerp from the finest materials by skilled artisans. Discover what engagement ring fits her personality.
Most viewed diamond jewels
-
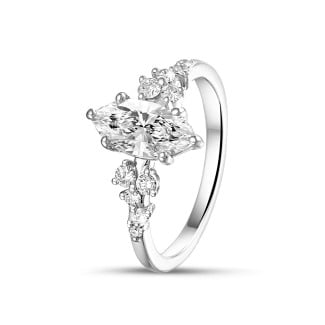
![1.00 carat solitaire cluster ring in white gold with marquise diamond]() BestsellerNew1.00 carat solitaire cluster ring in white gold with marquise diamondFrom USD 4.400,00 (excl. VAT)
BestsellerNew1.00 carat solitaire cluster ring in white gold with marquise diamondFrom USD 4.400,00 (excl. VAT) -
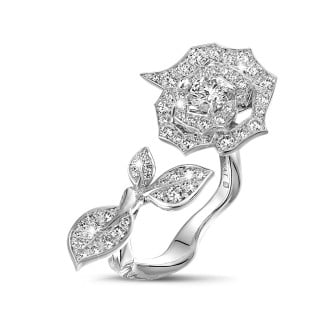
![0.95 carat diamond rose design ring in white gold]() NewPrincess Delphine0.95 carat diamond rose design ring in white goldFrom USD 16.000,00 (excl. VAT)
NewPrincess Delphine0.95 carat diamond rose design ring in white goldFrom USD 16.000,00 (excl. VAT) -
![1.00 carat solitaire ring with an asscher cut diamond in white gold]() Bestseller1.00 carat solitaire ring with an asscher cut diamond in white goldFrom USD 4.700,00 (excl. VAT)
Bestseller1.00 carat solitaire ring with an asscher cut diamond in white goldFrom USD 4.700,00 (excl. VAT) -
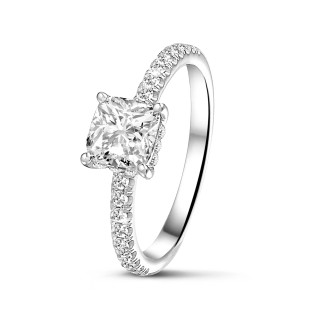
![1.00 carat solitaire ring with a cushion diamond and hidden halo in white gold]() BestsellerNew1.00 carat solitaire ring with a cushion diamond and hidden halo in white goldFrom USD 4.010,00 (excl. VAT)
BestsellerNew1.00 carat solitaire ring with a cushion diamond and hidden halo in white goldFrom USD 4.010,00 (excl. VAT) -
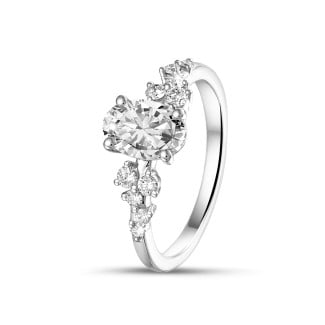
![1.00 carat solitaire cluster ring in white gold with oval diamond]() BestsellerNew1.00 carat solitaire cluster ring in white gold with oval diamondFrom USD 4.590,00 (excl. VAT)
BestsellerNew1.00 carat solitaire cluster ring in white gold with oval diamondFrom USD 4.590,00 (excl. VAT)

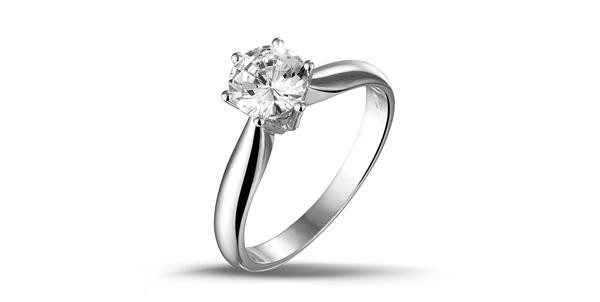
The diamond's brilliance is maximized when photographed in a close-up setting, highlighting our commitment to quality and smart investment. Emphasizing each intricate detail increases the brilliance of the diamond(s) in your engagement ring.
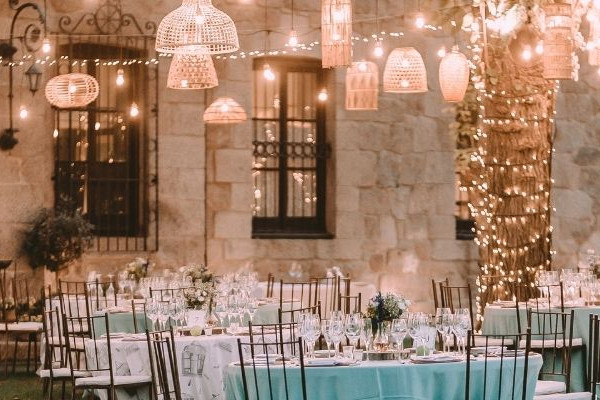
Nestle the ring in a tranquil, natural setting for a serene result. Ditch the flash as it may detract from the ring's natural allure. Instead, utilize the sun's radiant glow for the ultimate illumination. This, accompanied by the soft blush of flowers, will render your photograph romantically enchanting.
A camera lens's perception surpasses what the naked eye may see. To ensure the lens captures the ring in its full glory, it's essential to clean it thoroughly. An impeccably cleaned diamond is a symbolic representation of BAUNAT's efficiency and commitment to optimal quality.
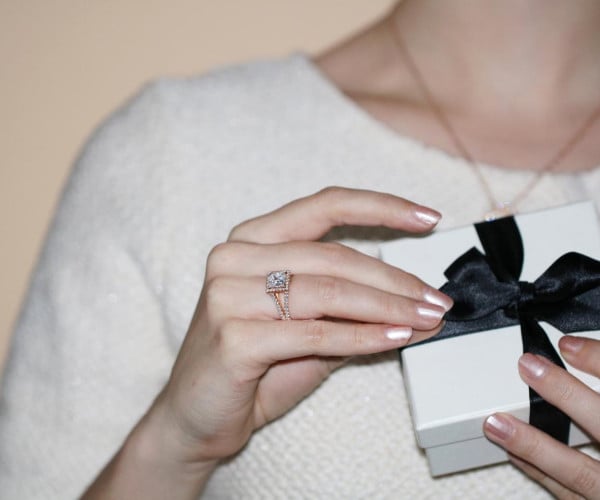
If your manicure is not up to your desired standards, a closed-hand picture might be your best bet. Remember, the focus remains on the meticulously crafted engagement ring. Refrain from using filters; they may distort the diamond's authentic beauty. As an emblem of luxury and elegance, a diamond ring from BAUNAT doesn’t need any additional embellishments.
Keep an eye on our Instagram profile for more inspiration and for the latest updates on our collection, most notably the evolving diamond prices. Share your sparkling BAUNAT engagement ring by including the hashtag #baunat and receive our admiration. We believe every magnificent diamond ring should be in the spotlight.
Proposing to your beloved is a momentous occasion, and we at BAUNAT, renowned for personalized service, are here to assist. Explore our extensive collection of beautiful engagement rings. If a particular model catches your eye or you have any queries, don't hesitate to get in touch.
As the Diamond price evolution continues to shape the market, let BAUNAT guide you through. We are dedicated to keeping our valuable smart luxury consumers informed about current industry trends. Remember, when it comes to capturing the beauty of your unique engagement ring, keep these tips in mind.
Quick checklist: Capture your engagement ring in 8 steps
1. Prep the ring: Remove oils and dust so the diamond catches light cleanly. Tip: soak briefly in warm soapy water, then dry with a lint-free cloth and wear cotton gloves or hold the band by its underside.
2. Clean the setting: A spotless setting shows facets clearly and reduces unwanted reflections. Tip: use a soft brush to reach prongs and pavé without loosening stones.
3. Choose the background: Pick a neutral, textured surface to add depth without stealing attention. Tip: place the ring 10–20 cm from the background to create pleasing bokeh on phone portrait mode.
4. Set up your light source: Use soft, diffused natural light to reveal fire and sparkle. Tip: position the ring near a north-facing window or diffuse sunlight through a white curtain.
5. Camera or phone settings: Lock focus, control exposure and keep ISO low for sharp detail. Tip: use portrait mode on phones and exposure lock, or a low ISO and moderate aperture on cameras.
6. Try multiple angles: Capture the table, profile and crown view to show cut, setting and side details. Tip: tilt the ring slightly toward the light to boost brilliance.
7. Take multiple exposures: Shoot several frames with slight exposure variations to choose the best highlights and shadows. Tip: bracket manually on a camera or use burst mode on a phone.
8. Quick in-phone edits: Make gentle adjustments to exposure, contrast and white balance only. Tip: avoid heavy filters so the diamond’s true color and sparkle remain authentic.
Camera & phone settings + troubleshooting
Smartphones
- Use portrait mode or a dedicated close-up mode to keep the ring sharp while softening the background. Tap to focus on the table facet and then lower exposure by a third to two-thirds to preserve highlights. If your phone has manual controls or a pro app, set ISO as low as possible and lock exposure for consistent frames.
- Stabilize the phone with a small tripod or rest it against a steady surface to avoid blur. Use a self-timer or Bluetooth remote to eliminate motion from pressing the shutter.
- HDR can help in high-contrast scenes but use it sparingly; it can reduce sparkle. Instead, bracket exposures by slightly under- and over-exposing to capture both detail and shine.
DSLR / Mirrorless cameras
- Aperture: choose between f/4 and f/11 to balance sharpness across the diamond and enough depth of field to show setting detail. Wider apertures give stronger background blur; smaller apertures increase overall sharpness but need more light.
- Shutter speed: keep it fast enough for handheld shots; with a tripod you can use slower speeds and keep ISO low for cleaner images. For handheld, aim for at least 1/125s or faster depending on focal length.
- ISO: keep ISO low to reduce noise, raising it only when light is limited. Prefer a tripod over high ISO when possible to retain fine detail in the stone.
- Focus: use single-point autofocus on the table facet, or focus manually with live view magnification to ensure the diamond’s face-up facet is crisp.
Lighting and modifiers
- Diffuse direct sunlight with a white cloth or use a reflector to bounce soft light into shadowed areas. Small LED panels with adjustable intensity and color temperature give consistent, daylight-balanced light.
- Avoid direct on-camera flash, which creates harsh reflections. Angle light sources to create controlled highlights that reveal sparkle without hotspots.
Tripod and remote shutter
-
A compact tripod plus a remote shutter or timer minimizes camera shake and allows precise composition. Small adjustments to the ring or light are easier when the camera stays steady.
Troubleshooting
- Glare or harsh reflections: reposition the light and shoot at a slight angle to the ring to reduce mirrored surfaces; add diffusion to soften highlights.
- Out-of-focus subject: lock focus on the diamond’s table facet, use a smaller aperture for more depth of field, or switch to manual focus with magnified live view.
- Color cast: white balance can shift colors; set a custom white balance or correct in post by sampling a neutral area from the scene.
- Sparkle looks flat: try slight under-exposure, move the light to create small, bright specular highlights, or capture multiple exposures and blend to preserve both detail and fire.
These practical settings and quick fixes help reproduce the ring’s brilliance reliably, whether you’re using a phone or a dedicated camera. Small angle, exposure and light adjustments usually yield the most natural, flattering results.
How to photograph engagement ring - Practical shooting workflow
Preparation: choose light and a background that flatter the stone. For a natural look, use indirect daylight near a north-facing window or open shade outdoors; avoid direct sun that creates harsh hotspots. For more control, use a softbox or diffusion panel to produce even, wraparound light. Neutral textured backgrounds such as linen, matte wood or dark velvet work well to increase contrast; for a romantic touch add a single bloom or a folded ribbon, but keep props out of focus. Clean the diamond and setting before shooting to remove dust and fingerprints, and minimise reflections by adjusting the ring angle or the light position.
Shooting: practical camera and phone settings that give reliable results. Phone: newer iPhones - use Portrait mode or a Pro/Manual app, switch off flash, lock focus on the diamond and reduce exposure about -0.3 to -1.0 stops to protect highlight detail. If available, enable macro/close-up mode and steady the phone on a small tripod or a steady surface. Android phones with a macro lens: use the macro lens or Pro mode, set ISO 50–200 and aim for a shutter speed of 1/100s or faster when handheld. DSLR/Mirrorless: use a macro lens (90–105mm) or a 50mm with a macro extension; try aperture between f/4 and f/11 depending on how much depth of field you want, ISO 100–200 and shutter speed 1/125s or faster when handholding - on a tripod you can use a slower shutter for lower ISO. Example starting points: 50mm at f/2.8, 1/200s, ISO 100 for a single-stone ring on a tripod; 100mm macro at f/8, 1/160s, ISO 100 for close detail of pavé or halo settings. Use manual focus or focus peaking when possible and check focus on the diamond table or a leading facet.
Framing & composition: pick angles that highlight the ring’s defining features. For a solitaire, shoot slightly above and off-axis to show the profile and the table sparkle. For halo and pavé settings, use tighter, level framing to show side stones and the halo’s relation to the centre stone. Capture one or two contextual frames: a close macro for detail, a three-quarter angle for the setting, and a wider environmental frame with hands or the proposal moment. Use the rule of thirds for dynamic layouts, or centre the ring for classic symmetry. When photographing on a finger, close the hand slightly so the ring sits naturally and keep knuckles relaxed.
Troubleshooting: quick fixes for common issues. Glare and reflections: change the angle of incidence by moving the ring or the light source, or fit a polarising filter to a camera lens to reduce reflections. Soft, diffused light cuts hotspots; if reflections persist, lower exposure and lift midtones in editing. Focus problems: if autofocus hunts, switch to manual focus and move the camera a fraction forward or back until facets become sharp; use live view magnification to confirm. Dust and lint: use a blower or a fine brush between frames rather than wiping while shooting. Motion blur: increase shutter speed or stabilise the camera with a tripod and remote trigger. Highlight clipping: when facets become pure white, lower exposure and recover highlights in post-processing.
Put these steps together into a short, repeatable workflow and you’ll get consistent, high-quality images of an engagement ring every time.
Post-production: a minimal editing pipeline for flattering results
Start with a careful crop and straighten the horizon or finger line to improve composition. In phone editors or Lightroom Mobile, first correct white balance so the diamond’s fire looks natural. Adjust exposure to retain highlight detail, then raise shadows slightly to reveal metal and setting. Use clarity or texture in very small amounts to sharpen facets without causing glare.
Remove dust and lint with the healing or clone tool: zoom in, sample a nearby clean area and paint over the speck, then check at 100% to ensure the repair is invisible. Avoid heavy skin smoothing when the hand is visible; instead use targeted healing for tiny blemishes and keep skin texture intact.
Export recommendations: for Instagram use a square or 4:5 crop and export at high quality (about 1080–1350 px on the long edge), for Facebook export a wider JPEG at high quality, and for printing export at 300 ppi with suitable dimensions. Keep file size reasonable for web sharing by choosing a high-quality JPEG with moderate compression.
Three short before/after steps:
1) BEFORE: slightly overexposed highlight, uneven white balance. AFTER: reduce exposure slightly, correct white balance, recover highlights.
2) BEFORE: distracting speck on the bezel. AFTER: use the healing tool at 100% zoom and verify the repair is seamless.
3) BEFORE: weak composition. AFTER: crop tighter to 4:5 or square to emphasise the diamond and improve framing.
-
Fabienne Rauw
-
BAUNAT Antwerp
-
-
Fabienne, manager of the German market is able to guide every client with finding the right jewel. She takes care of most of the German orders, but also takes other task on her plate. Thanks to her six years of experience at BAUNAT she acquainted well with the product and the marketing around it. Her degree in PR ensures that BAUNAT is well presented across all media channels. For anyone looking into a new investment opportunity, Fabienne is the perfect guide in this process. No question will be left unanswered, and she will help you every step of the way.
Selected Bespoke Projects
• Eternal Bloom bespoke engagement concept - Role: project lead for client briefing and prototype coordination. Fabienne translated personal design references into a 3D-printed prototype, supervised stone selection and ensured the finished piece matched the client’s vision and comfort preferences.
• Personalized anniversary necklace - Role: design coordinator and quality overseer. She managed the custom design process from the initial sketch to final polishing, liaising between client and workshop to preserve proportions and finish.
• Reimagined heirloom ring restoration and redesign - Role: client consultant and technical coordinator. Fabienne guided the client through options to modernize setting details while keeping sentimental elements, delivering a wearable result that respected the original piece.
Her hands-on involvement in bespoke commissions ensures each custom order has a clear brief, careful prototype review and close follow-up with the workshop, so clients receive a tailored jewel that meets both aesthetic and practical expectations.
Professional enquiries
For speaking engagements, press requests or research collaborations, please send your message to BAUNAT’s communications team with the subject line: "Fabienne Rauw - Professional Enquiry." Include a brief description of the request and any relevant dates or documents. The communications team will route enquiries to Fabienne and provide guidance on next steps.